Website Builder > Setup Next.js Project
Setup Next.js Project
Set up the Website Builder Next.js starter kit and connect it to your Webiny project.
- How to install and configure the Next.js starter kit
- How to connect your Next.js app to Webiny
- How to create and render your first page
Overview
This guide walks through setting up the Website Builder Next.js starter kit and connecting it to your Webiny project. The starter kit provides pre-configured routing, SDK setup, and rendering so you can start building pages immediately.
For an explanation of how the Website Builder architecture works, see How It Works.
Prerequisites
- Running Webiny project (Core and API applications deployed)
- Node.js 20.9+ installed (Node.js 24+ still required if working with Webiny CLI)
- Familiarity with Next.js App Router
Installation
Clone the Starter Kit
The official Next.js starter kit provides pre-configured routing, SDK setup, and rendering:
Match Webiny Version
Before installing dependencies, ensure the SDK versions in package.json match your Webiny version. You can find your version by running webiny --version in your Webiny project directory.
The ~ prefix allows safe patch updates.
Configuration
Get Credentials
To connect the starter kit to your Webiny project, you’ll need an API key, API host URL, and tenant ID. The easiest way to get these is through the Configure Next.js shortcut in Webiny Admin — click Support in the bottom-left corner and select Configure Next.js.
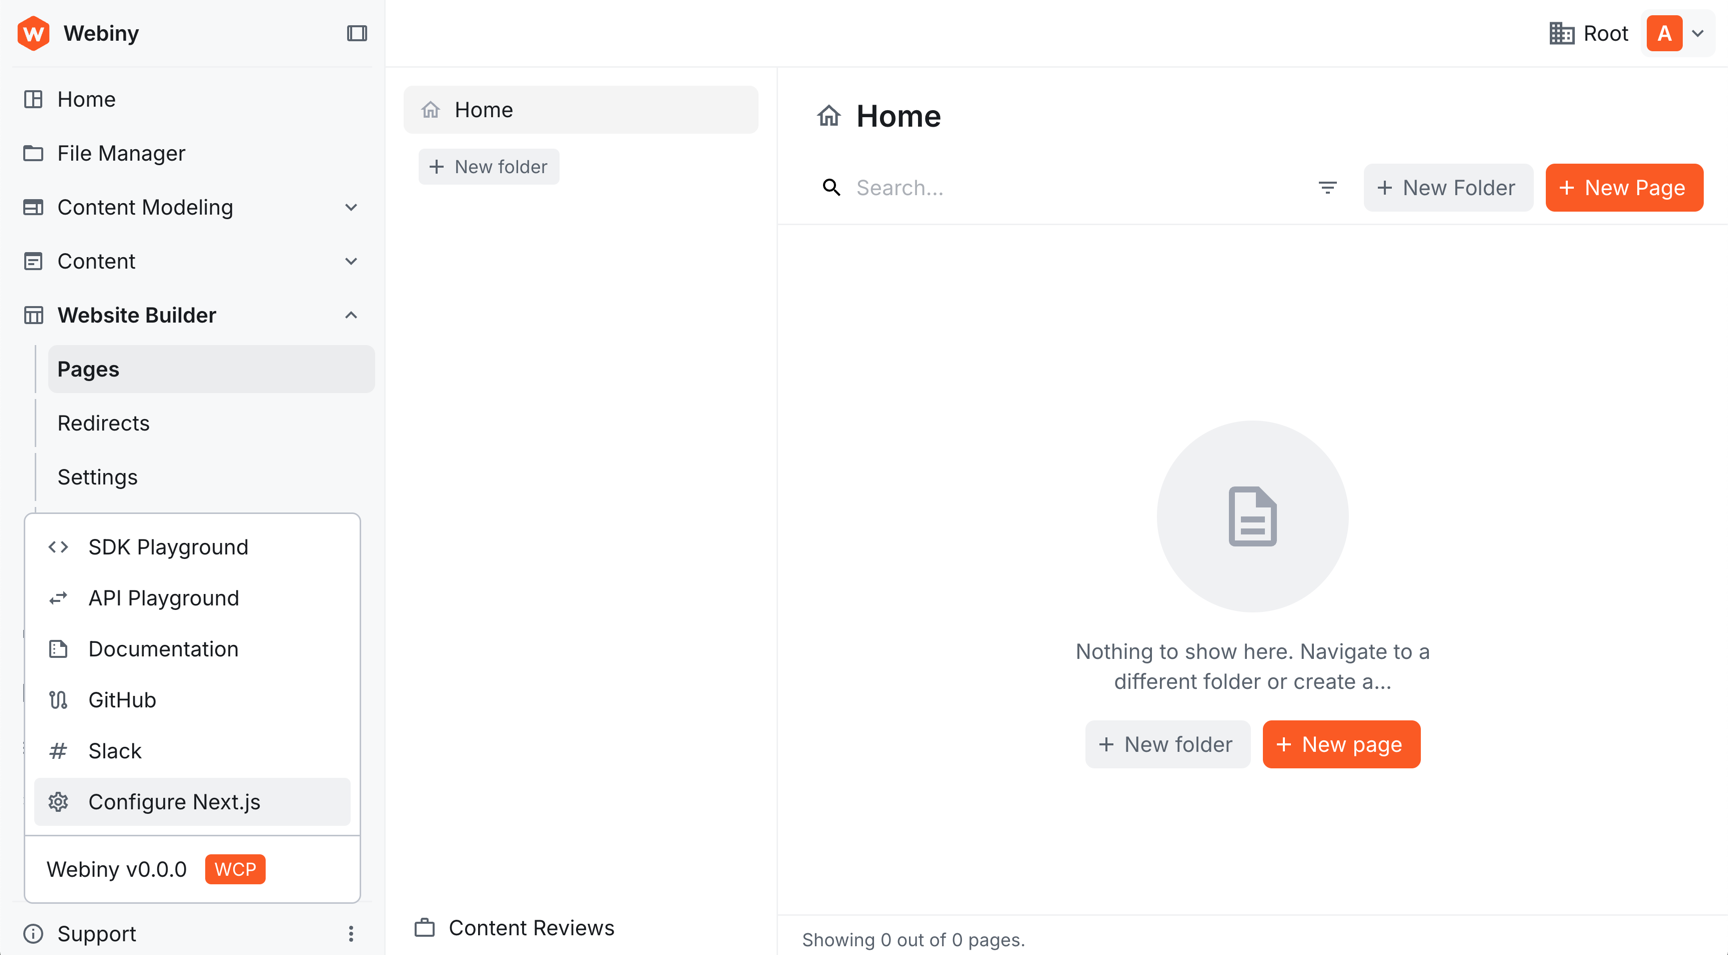 Webiny Admin sidebar with the Support menu open, showing the Configure Next.js option
A dialog appears with the three environment variables already filled in and ready to copy:
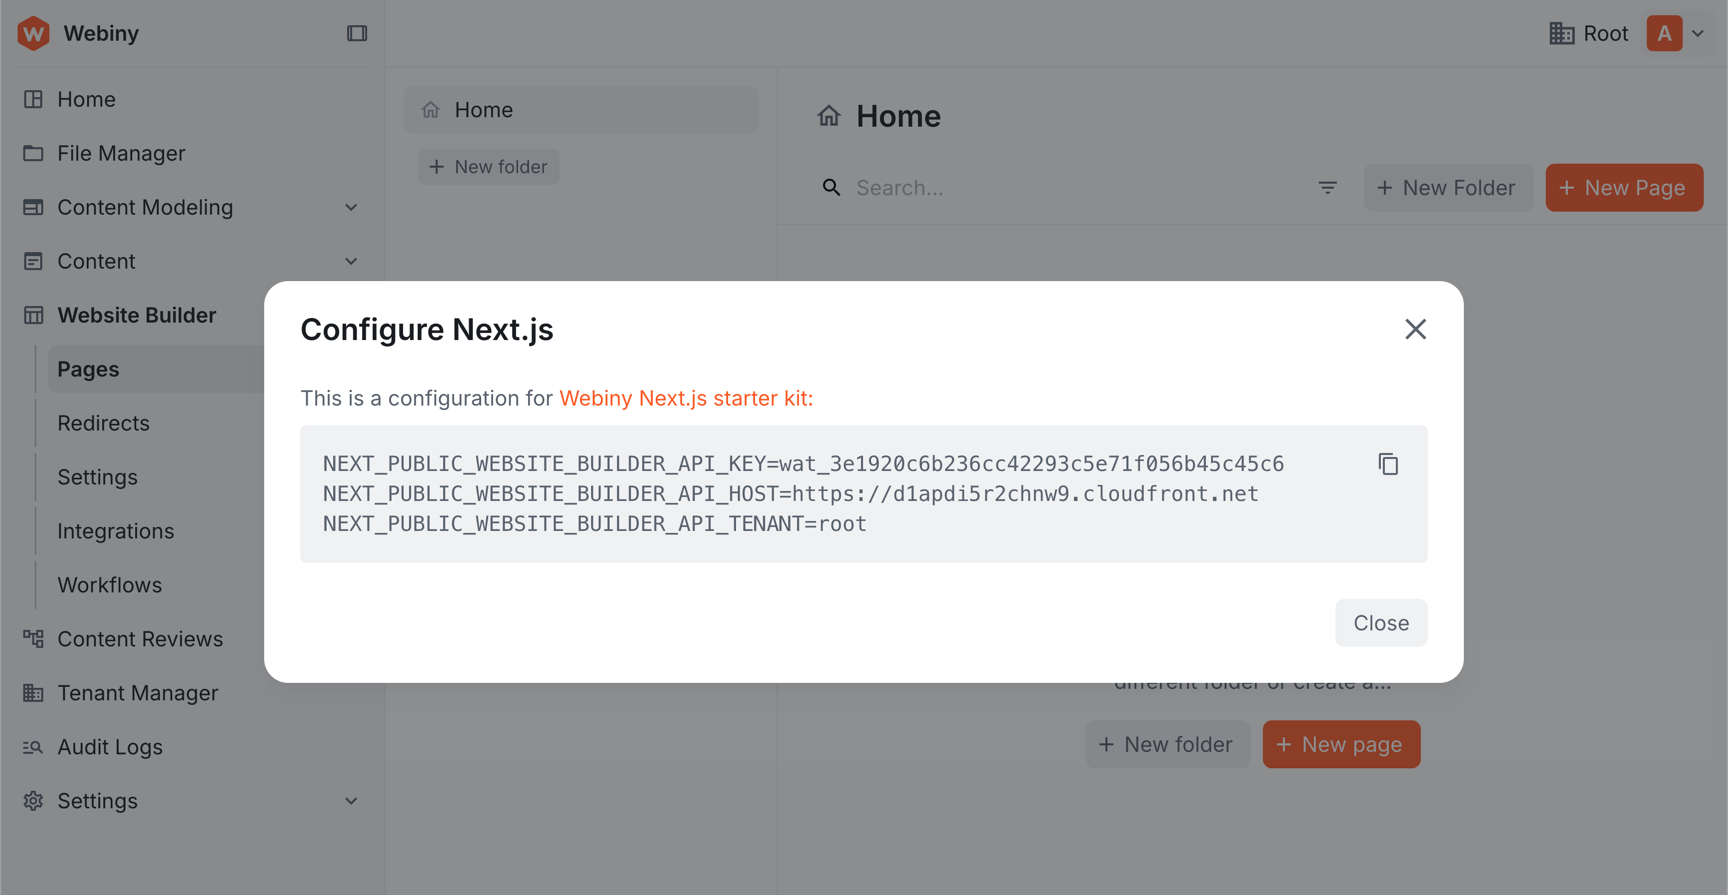 Configure Next.js dialog showing NEXT_PUBLIC_WEBSITE_BUILDER_API_KEY, API_HOST, and API_TENANT pre-filled
Click the copy icon and paste the block directly into your .env file in the next step.
If your Admin is running on a non-localhost domain (i.e. a deployed CloudFront URL), the dialog will also include a NEXT_PUBLIC_WEBSITE_BUILDER_ADMIN_HOST variable — make sure to copy that too.
API Key Is Auto-Created
Unlike the Headless CMS where you need to manually create an API key, the Website Builder API key is created automatically for the current tenant. You’ll find it under Settings → Access Management → API Keys as “Website Builder”. It’s a read-only key, intentionally scoped that way since it’s meant to be used in external frontend apps like your Next.js project.
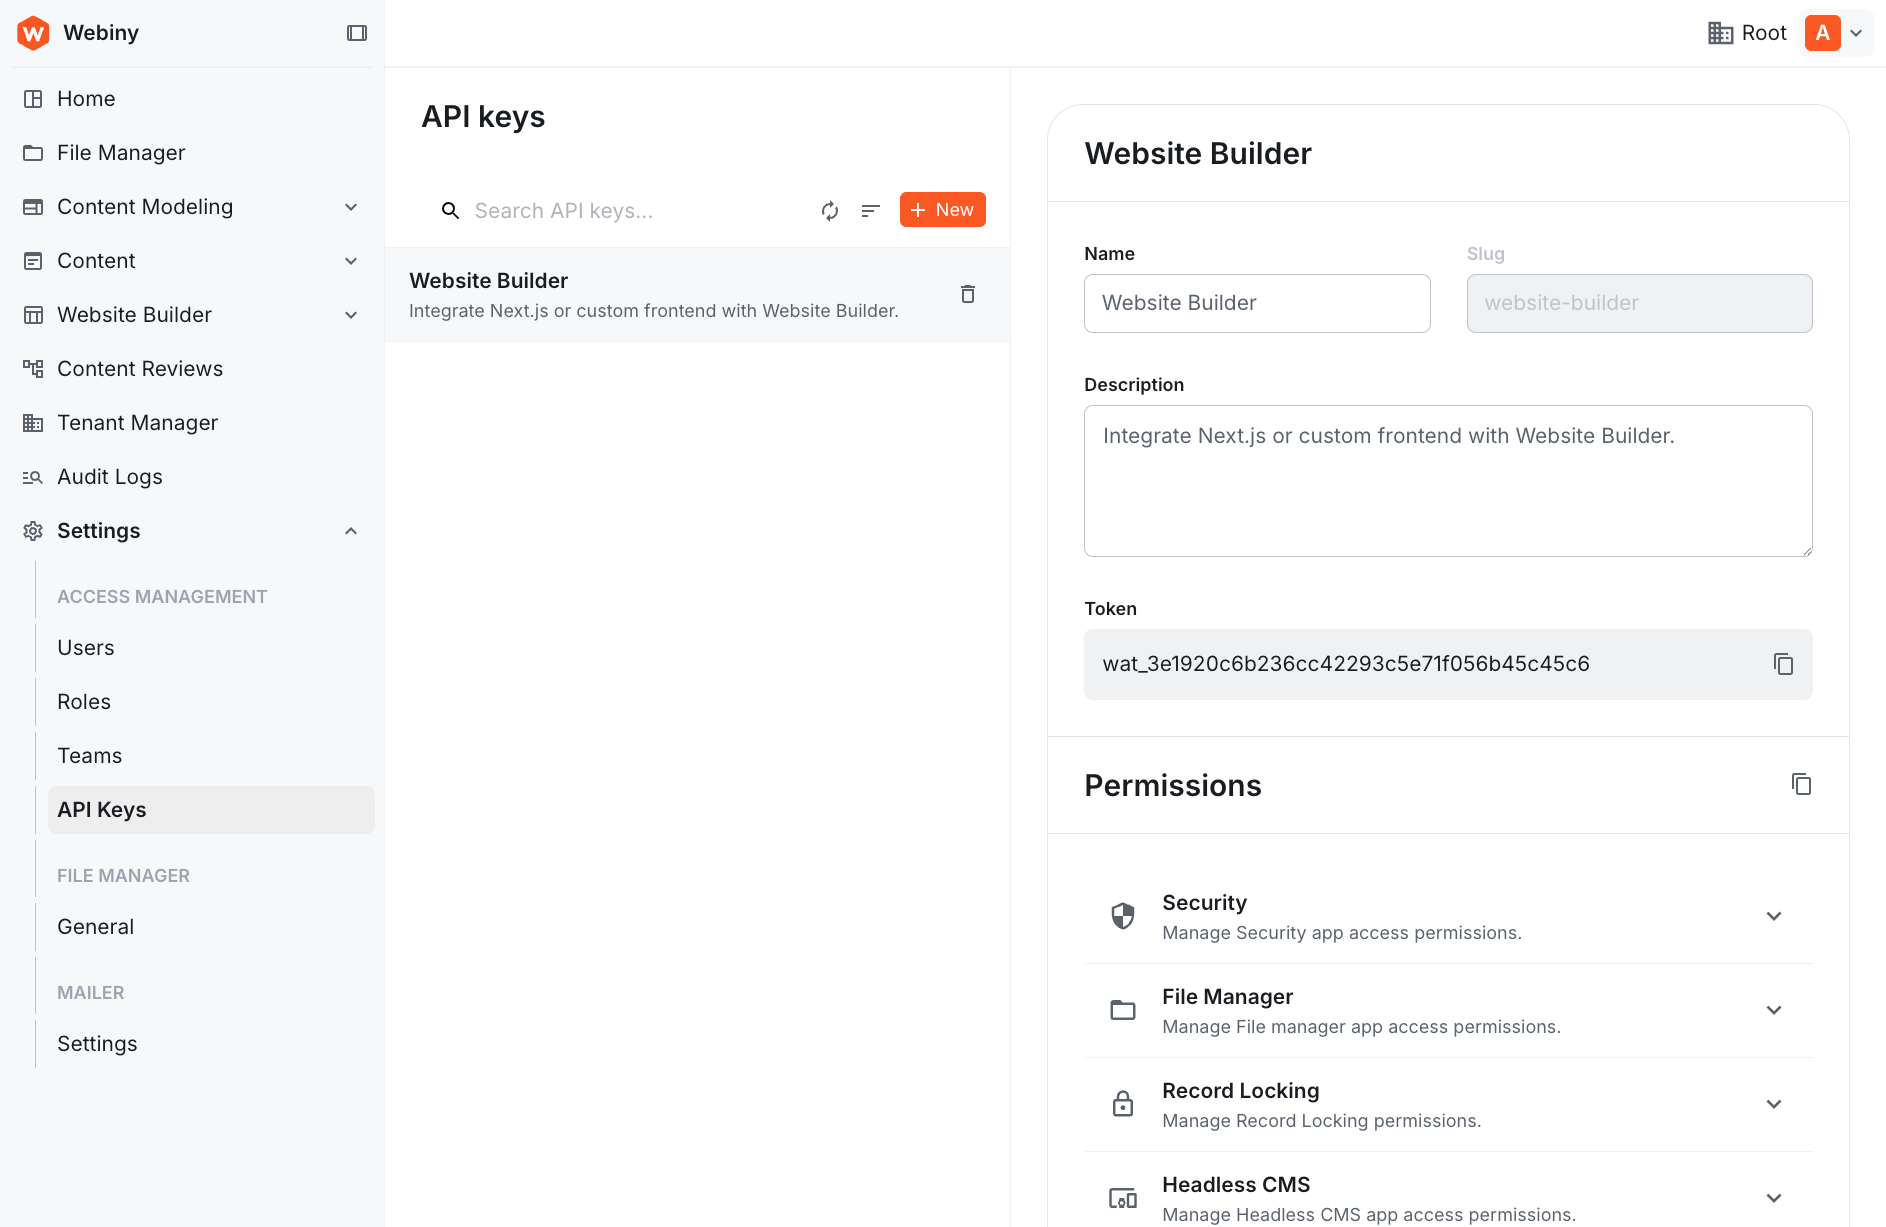 API Keys page showing the auto-created Website Builder key
Set Environment Variables
Create a .env file in your Next.js project root and paste the copied variables:
All three variables use the NEXT_PUBLIC_ prefix because they’re accessed client-side during live editing.
Start Development
Run the dev server:
Open http://localhost:3000 . You’ll see a “Page not found” message—this is expected since no pages exist yet.
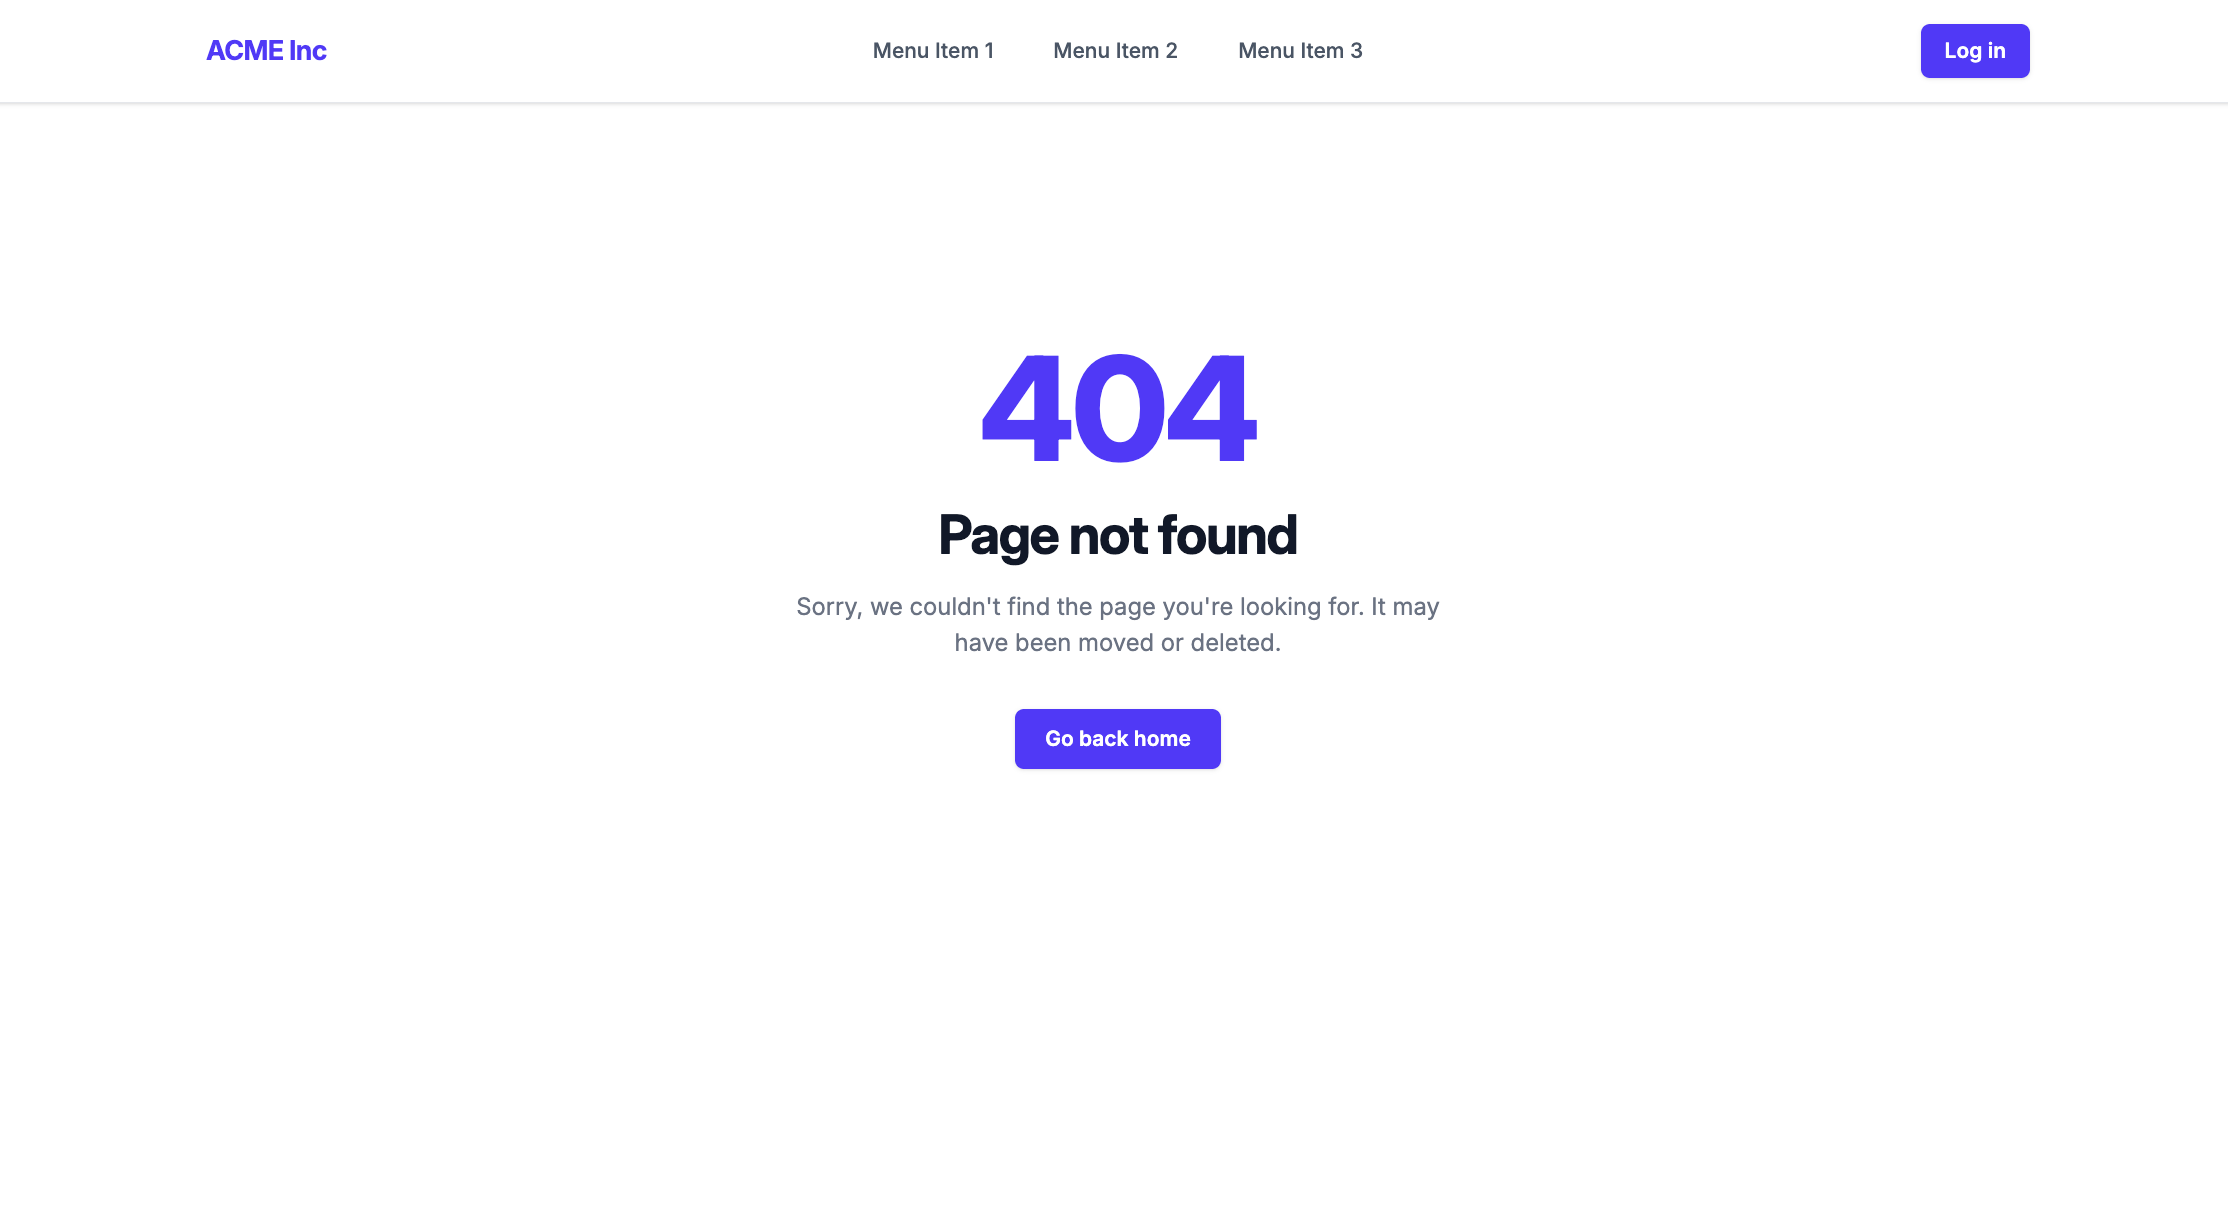 Browser showing the starter kit's 404 page with a Page not found message
Create Your First Page
- Open Webiny Admin
- Navigate to Website Builder → Pages
- Click New Page
- Set title to “Hello World” and path to
/ - Click Create
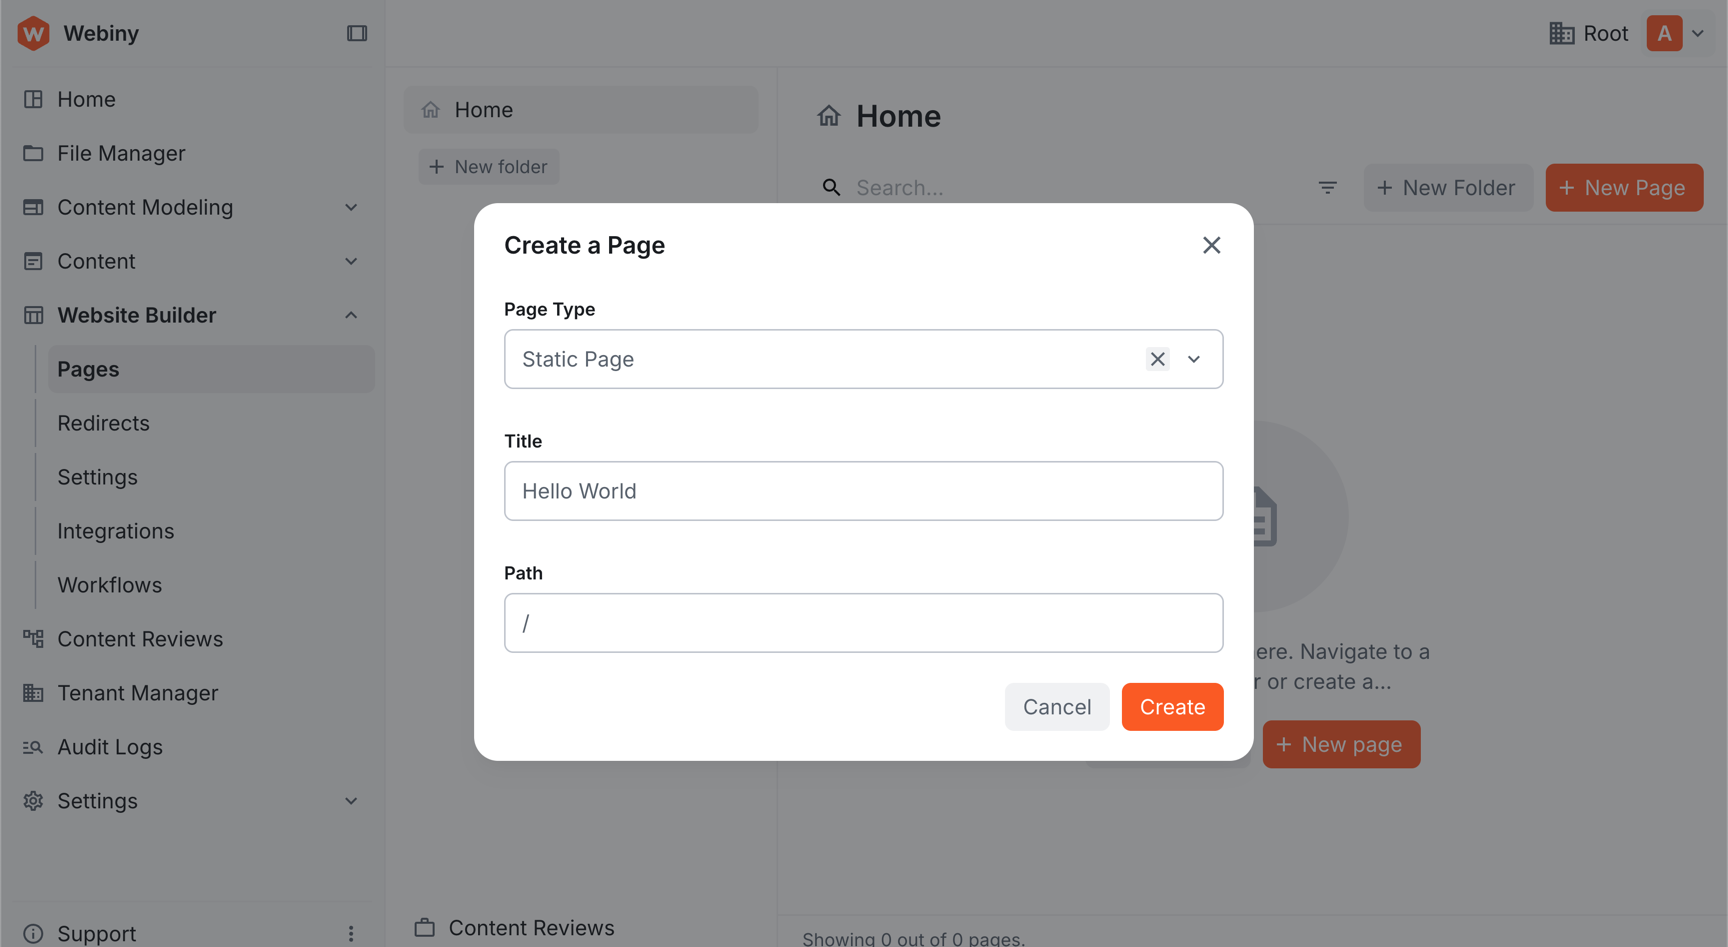 Create a Page dialog with Title set to Hello World and Path set to /
In the page editor:
- Find Hero #1 in the component palette (Custom group)
- Drag it onto the canvas
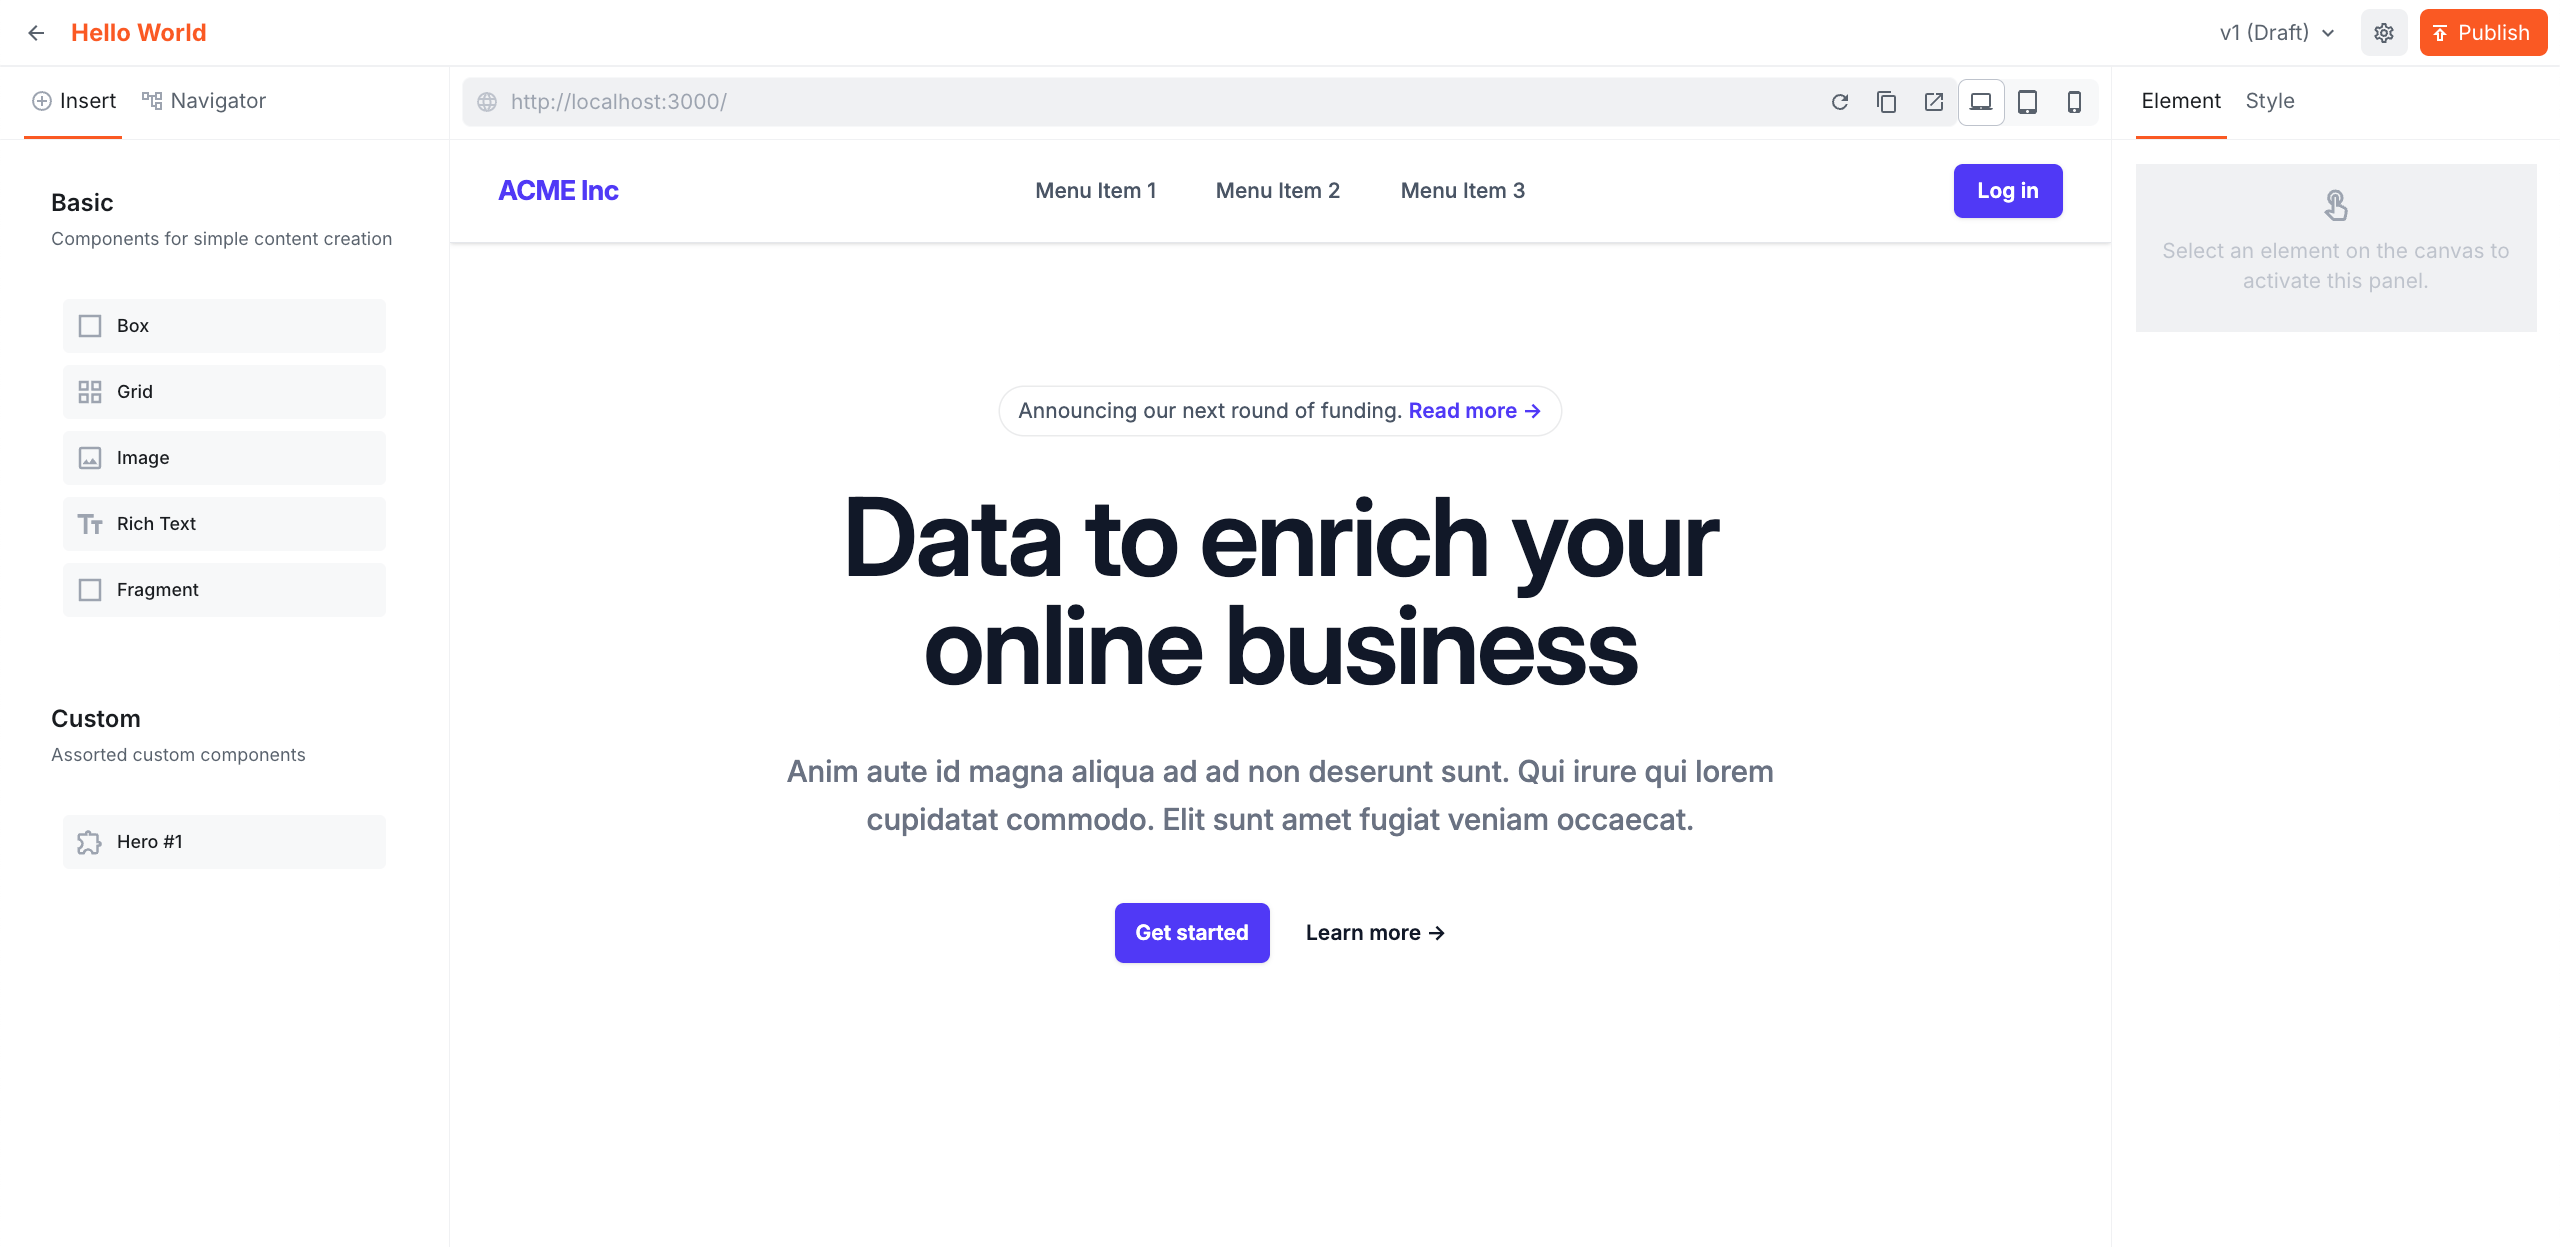 Website Builder editor with the Hero #1 component on the canvas
- Click Publish
Refresh http://localhost:3000. The hero component now renders on your homepage.
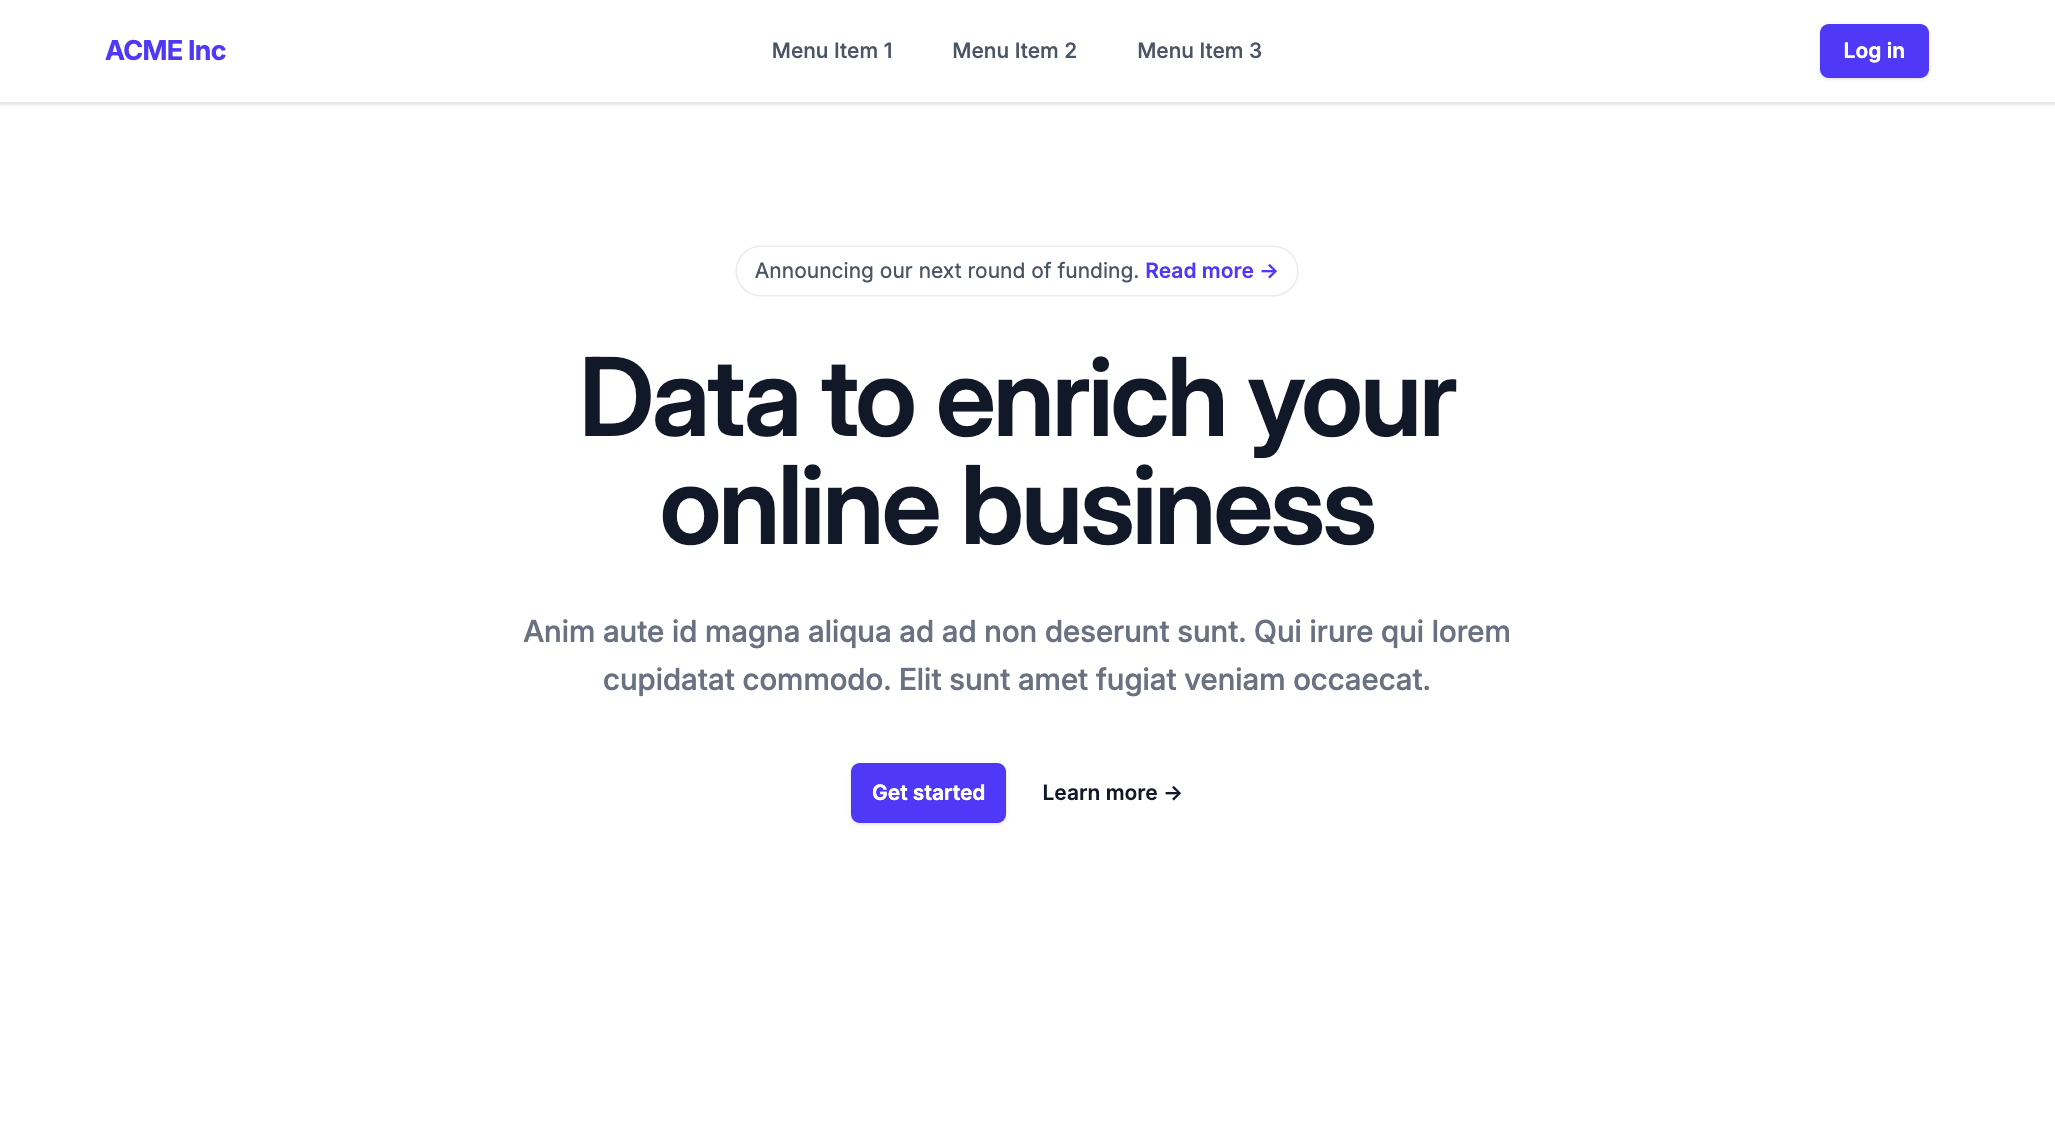 Browser showing the Hero #1 component rendered on the homepage
Project Structure
The starter kit includes:
src/app/[[...slug]]/page.tsx
Catch-all route that renders all Website Builder pages.
src/app/api/preview/
Enables Next.js draft mode for unpublished page previews.
src/contentSdk/
SDK initialization and configuration.
src/editorComponents/
Component registration—add your custom components here.
src/theme/
Theme configuration (CSS variables, typography, colors).
Next Steps
With the starter kit running and your first page rendered, you’re ready to customize the theme and create custom components.